Create a second room
So a one-room game is a good start, but your adventure game will be a lot more interesting when there are other rooms to travel to. Let’s create a park scene and link it to the pub scene so we can walk between them!
As we’ve already created the first scene, follow the same steps you used on the create a room page to create this new scene.
Create a new folder in your rooms folder and call it “park”
Create a new Godot scene and set
ESCRoomas its root node. Save the scene as “park.tscn”. * Note that you could call the scene something other than “park.tscn” - “room2” for example. Make sure you name things in a way that makes sense to your game!Give the room a global id (
park).We still want to play as Graham in this scene, so select it as the
Player Sceneparameter.Add an
ESCBackgroundnode for the room’s background graphics as a child of the root node.From
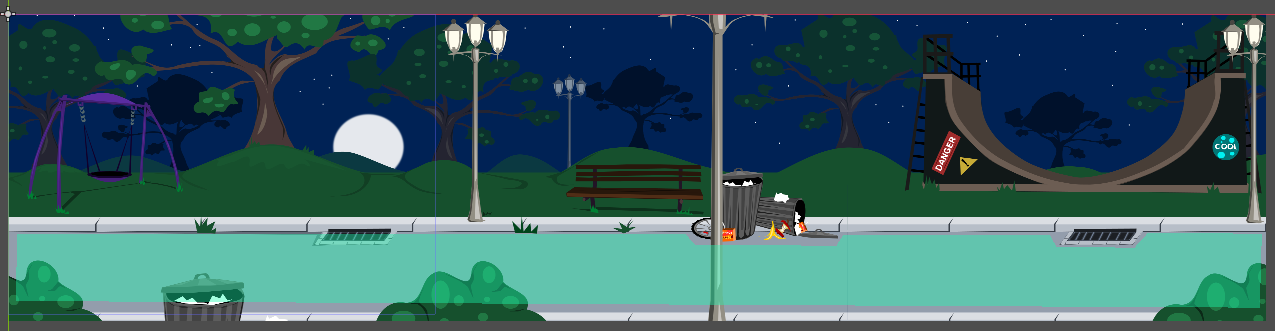
backgrounds.zip, copy thepark_bg.pngfile to the rooms directory and set it as theTextureparameter in theESCBackgroundnode. Note that you may need to use the “Scale” parameters of the node’s “Transform” setting to get the image to properly fit your UI, e.g. using a value of 0.79 for both x- and y-scaling. If you need to do this, be sure to do it before proceeding any further!Create a walkable area for the character: Add an
ESCTerrainnode to theESCRoomnode. Add aNavigationRegion2Dnode as a child of the newESCTerrainnode.Create a
NavigationPolygonresource for theNavigation Polygonparameter.
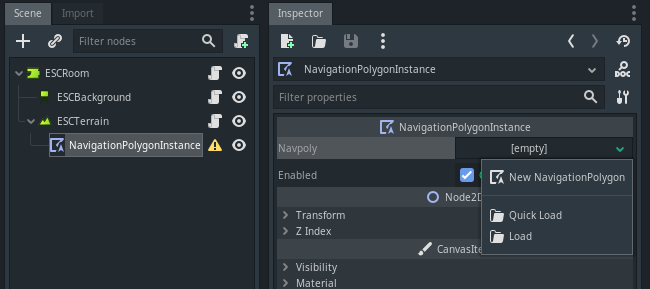
Use the editor window to draw a polygon. This polygon is the area in which the character can move around freely.
Creating a light map
For this room, we’re going to use a light map. As mentioned previously, light maps are used to shade different areas of the room differently. In this room, we have a lamp, so we want the player to be brightly lit when under it and less brightly lit when further away from the light source.
The example light map provided is a very simple one with just 3 colours to make it easier to demonstrate how the light map affects how the game character looks, but you could replace it with one that uses a gradient to fade nicely from white to mid-grey. Coloured light maps can also be used to simulate things like concerts or traffic lights.
Copy the “park_lightmap.png” asset (link on the main step-by-step) page into the “park” folder.
In the Godot GUI, select the ESCTerrain node and set its light map to the
“park_lightmap.png” texture.
Room exits in Escoria
To link room 2 (the park) to room 1 (the pub), you will need an exit node. When the player clicks the corresponding area on the screen, Escoria knows that you want to change rooms. Each room in Escoria can have multiple exits.
There are 2 different nodes for creating exits in Escoria. The first is an
ESCItem. By selecting its Is Exit checkbox
after you create an ESCItem node, Escoria will look for an “:exit_scene” event
in the attached script file. Any commands you place in the “:exit_scene” event will be
run when the player chooses to “use” the exit - for example, saying a goodbye,
or running a cutscene. Place a “change_scene” command as inside this event to
move the character to the next room.
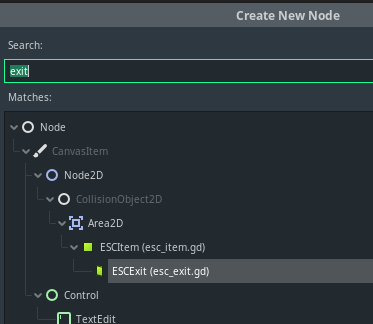
For exits that don’t require scripts, the ESCExit
node is provided. The only things you will need to configure on the node are the
Target Scene destination, and, optionally, a “switch sound” (the sound to
play when changing to the destination room).
For both ESCExit and ESCItem nodes:
* A child CollisionPolygon2D node is used to define where the player needs
to click to activate the exit.
* When the exit is activated, the character will automatically walk to an
ESCLocation node that is a child of the ESCItem / ESCExit node.
Hint
ESCExit nodes (or ESCItem nodes with Is Exit selected) only tell
Escoria to change rooms. It doesn’t tell Escoria where to place the player
in the new room, or anything else about how to set up the new room. This
configuration lives in :setup and/or :ready events which will be explained
shortly.
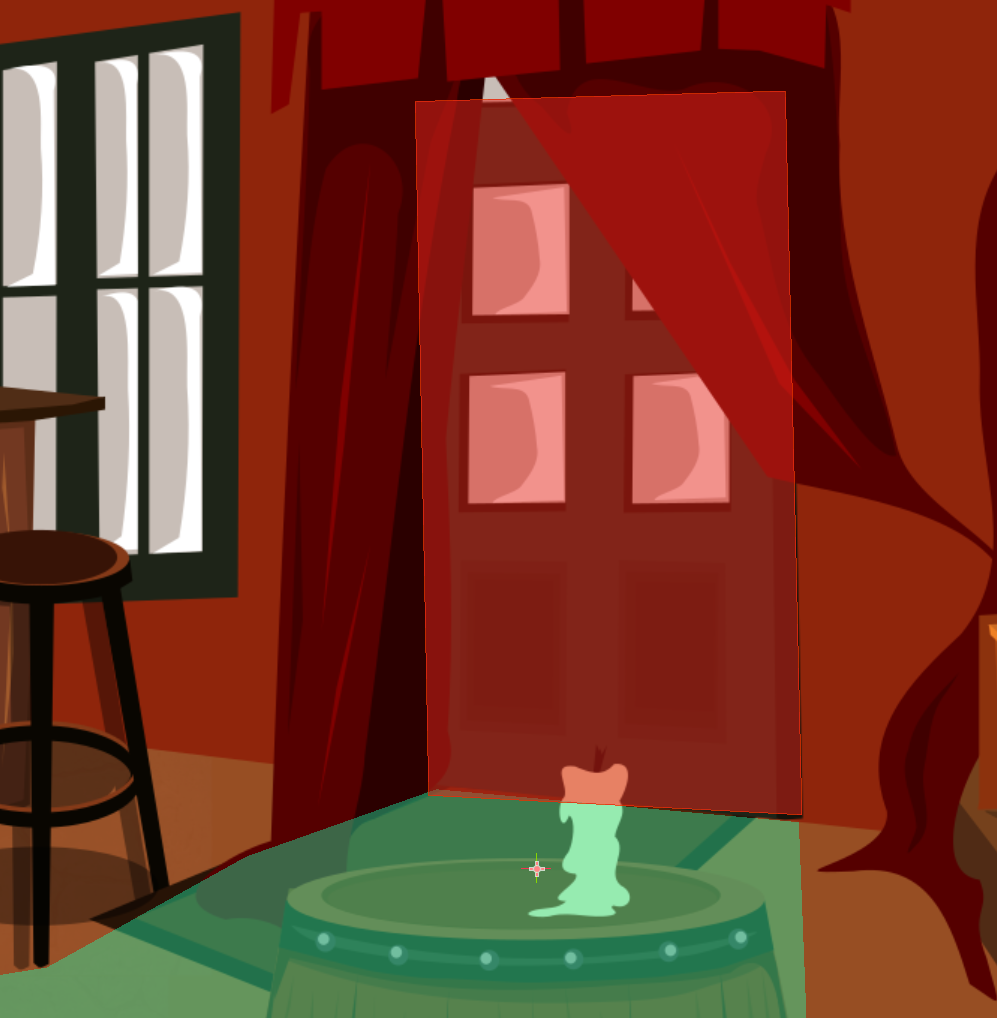
Create a doorway back to the pub room
Create an exit for our new room:
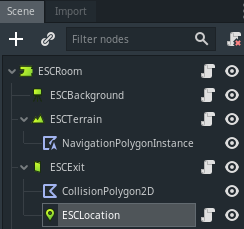
Under the ESCRoom node, create an ESCExit node.
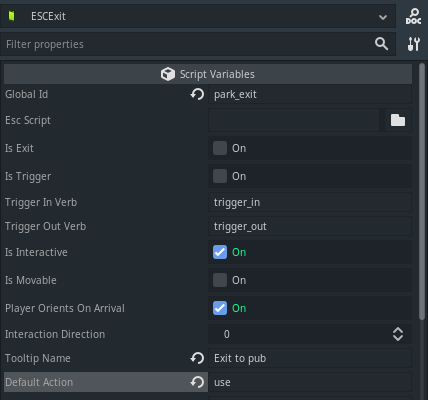
Set its Global ID to “exit_to_pub”.
Create a ``CollisionPolygon2D`` for the exit:
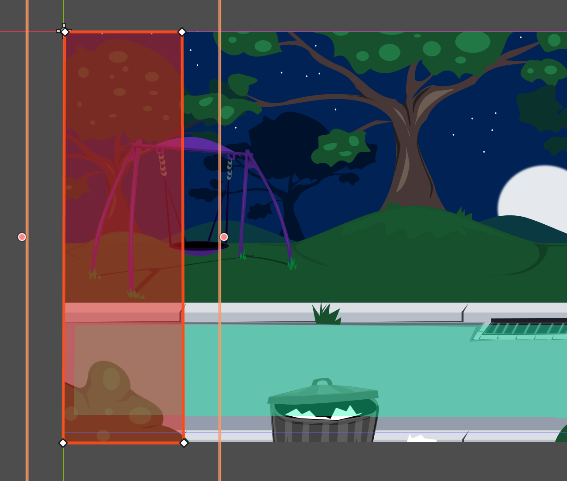
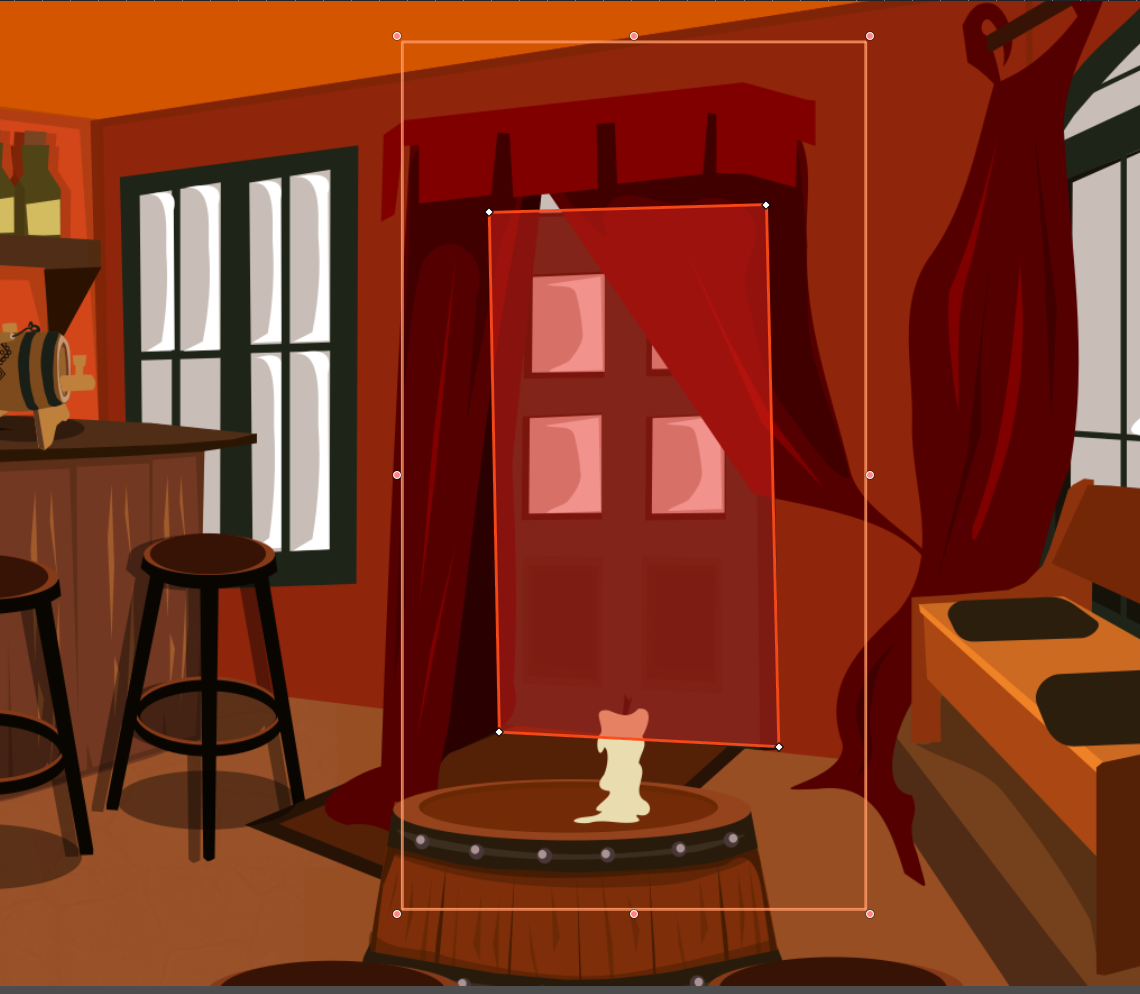
Create a CollisionPolygon2D as a child of the ESCExit. Use the editor window to
draw a rectangle covering the lefthand edge of the park background. This
polygon is the area which will act as a “door” for the player to click on to
change rooms. (If the room had a doorway, you’d draw the polygon around the
door instead).
Create an ``ESCLocation``:
When the player clicks on the exit’s collision polygon, Escoria needs to know where to make the character walk to in order to leave the room.
Create an ESCInteractionLocation as a child of the ESCExit. Give this location a
Global ID of “park_exit”.
Move the ESCInteractionLocation to the lefthand side of the park, somewhere on the
road/path. This will be where the character walks to to leave the park.
Hint
Make sure the ESCInteractionLocation is inside the walkable area (i.e. the navigation
polygon you created earlier)!
Set up the tooltip for the exit:
When you put the mouse over the exit, you want the tooltip in the UI to tell you what object your mouse is over.
Additionally, you want to set the default interaction that will happen with this exit
in order to make the experience better for the player. In the ESCExit node, under
Tooltip Name, put “Exit to pub”, and, under Default Action, put “use”.
Set the destination scene for the exit:
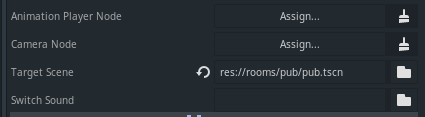
Also in the ESCExit’s settings, select the Target Scene. Clicking
this will take you to a file explorer where you can choose the room you want
the character to be sent to when the player clicks on this exit. Locate the
pub scene and select that. (If you had a noise to play, like a door closing when
the player used this exit, you would use the Switch Sound parameter to set
it).
Set up a doorway in the pub room
If you were to play the game now, you’d find it to be a bit broken. The game would start in the pub room, but you’d have no way to leave it to get to the park! If you were somehow able to get to the park and tried to get back, the game wouldn’t know where in the pub to place your character.
Lets fix this by creating a doorway in the pub and make it so that using it takes you to the park, and clicking on the edge of the park brings you back to the pub’s doorway.
The process here will be the same process we followed in the park.
Load your “pub.tscn” scene in the Godot editor.
Create an ESCExit as a child of the ESCRoom node. Give it a Global ID of
“pub_door”. Set its Target Scene to “park.tscn”. This will send the player to
the park when they click the door.
Create a CollisionPolygon2D as a child of the ESCExit node. Draw the
polygon around the doorway. This defines where you can click to
activate the exit to leave the pub and go to the park.
When you originally created the pub room, you set an ESCInteractionLocation for
the character’s starting point (e.g. at the bottom of the stairs). If the player comes
back into the pub from the park scene, they should be at the doorway rather than
appear at the bottom of the stairs. We therefore need an ESCInteractionLocation
at the doorway that we can send the player to when the player enters the pub again
after arriving from the park scene..
Create a new ESCInteractionLocation as a child of the pub’s ESCExit. Set its
Global ID to “pub_exit”. This will be where the user appears
when they come into the pub from the park. Place its marker
just under the doorway. This wil also be where the character walks to
when you click the door to leave the pub.
Hint
Make sure the ESCInteractionLocation is inside the walkable area polygon!
Configure the change between rooms
What we now need is to tell Escoria to move the character to the correct
location after they change rooms. For this, we will use a script that
will run when the room first loads. It will check which room the player has
come from and immediately send them to the correct ESCInteractionLocation.
Setup and Ready events
To finish the switch between rooms, we need to explain how the room change
should work. When you activate an ESCExit (or ESCItem with Is Exit
selected), you use the change_scene
command to tell Escoria to replace the current room with new room. It doesn’t
tell Escoria anything about how to set up the new room or where to put
the player: This is the responsibility of the new room.
Each room’s root node is an ESCRoom node, and the script attached to it
(if there is one) is responsible for setting up anything dynamic in the room.
When change_scene loads the room, it will look in the new room’s script for
a :setup event. Any commands you put as part of this event will run before the
player sees the new room–use this to reset any movable objects to their
respective start positions.
After the :setup event completes, a transition will run (there is a default
one set in the Escoria configuration settings), but typically the transition
will be some sort of nice fade-in effect to show the room. Once the “transition
in” finishes, Escoria will run any commands that are in the :ready event. Place any
commands in here that will tell the next part of your game’s story (e.g. make
the player walk to the window and comment on how it looks like a storm is
approaching).
Hint
If you do not have a script attached to your ESCRoom, the player will
automatically be placed at a start location called player_start if you
have created an ESCInteractionLocation node with player_start as
its name as part of the room.
If an ESCInteractionLocation (or ESCLocation) with this name does
not exist, the player will start as close to coordinates (0,0) as possible,
i.e. the scene origin.
Hint
There can only be one of each type of these two events per script. If you want
multiple steps to run as part of an event (the :ready event for example), place
all the commands within the one event block.
Hint
Transitions are run by default as part of the change_scene
command, but this can be manually overridden if desired.
For more details on the order in which events are processed in Escoria, see : https://docs.escoria-framework.org/en/devel/advanced/escoria_architecture.html#game-start-sequence
Setting the character’s start position in each room
Create a new ASHES script “room_pub.esc” and set it as
the ESC Script on the pub room’s ESCRoom node. This is the script the
room will use when it starts.
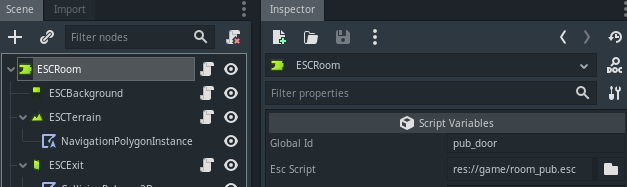
Add the following code to “room_pub.esc”:
:setup
  if ESC_LAST_SCENE == "park":
     teleport($graham,  $pub_exit)
     # Have the player look at the camera
     set_angle($graham, 180)
This code says
1) Run these steps when setting up the room.
2) Check if the global_id of the last room you were in (ESC_LAST_SCENE) is “park”.
3) If so, teleport the object “graham” to the ESCLocation called
“pub_exit”.
4) Finally, make the player face left.
Hint
If the last scene wasn’t the “park” scene, the condition check will not be
true, so the commands (“teleport” and “set_angle”) will not execute.
If you don’t have any other code to tell Escoria where to place the player,
they will be placed at the “player_start” ESCLocation or coordinate
(0,0) as explained above.
Now follow the same process to create an ASHES script called “room_park.esc” in the park folder for the park scene.
Load the park scene and configure “room_park.esc” as the ESC Script on the
park room’s ESCRoom node. This is the script the park room will use when
it starts.
Add the following code to “room_park.esc”:
:setup
  if ESC_LAST_SCENE == "pub":
     teleport($graham, $park_exit)
     # Have the player look to the right
     set_angle($graham, 90)
Test the scene. You should now be able to click on the door to leave the pub and you will appear in the park. If you click on the lefthand side of the park, you will appear in the doorway of the pub.
Additionally, due to the light map configured for the park scene, you should be in shadow when you walk in the park and become lighter when you walk under the light.
Hint
To stop any further commands from running in a script as part of any event
(at the end of a conditional statement, for example), add a stop
command or use the stop keyword. No further commands for the event will be
run until and the event finishes executing.
Creating an exit using an ESCItem instead of an ESCExit
As mentioned earlier, for more complex exit sequences, an ESCItem is used
rather than an ESCExit.
If you wanted to create the pub door using an ESCItem, you would:
Create an
ESCItemas a child of theESCRoomnode. Give it a Global ID of “pub_door_item”.
Hint
If you previously created an ESCExit as part of this
tutorial, you can right-click on the ESCExit and change the node’s type to
ESCItem. This should preserve the children nodes as they currently are.)
Set the
ESCItem’s “Is Exit” parameter to “On” (that is, make sure its checkbox is checked). This is important in order for the node to know how to behave and what scripts to call (if any) when the player tries to exit the pub room.Create a new ASHES script file and call it “pub_exit.esc”. Where you place this file is up to you (consider what makes sense for your project). You might choose to store it with the room, or keep all your game’s scripts together in a “scripts” folder.
In “pub_exit.esc”, add an
:exit_sceneevent to the ASHES file and, within it, use thechange_scenecommand to make the game switch from the pub room to the park room whenever the player “uses” the exit. You would add to this script any other animation/dialog/etc. that you want to be played when the player activates the exit, e.g.
:exit_scene
  say($graham, "I'm leaving now.")
  change_scene("res://rooms/park/park.tscn")
Change the “Esc Script” of the
ESCItemnode to point to your script so Escoria runs the code you’ve just written whenever the user exits the scene using this node.
Run the game and exit the pub. You should notice Graham announcing his departure from the pub before moving on to the park!