Create a player character
Escoria is a framework optimized for 3rd person point and click adventure games. These types of games usually feature an animated character that can walk across a background graphic and interact with items.
A character in Escoria is based on the node type ESCPlayer.
Create a new folder in the characters folder (be sure to create the folder if it doesn’t already exist) for the new character. We will call our character “Graham”.
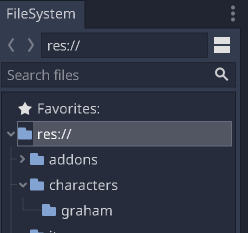
Inside the folder, create a new scene and select ESCPlayer as the root node
type. Save it as “graham.tscn” under the folder we created above.
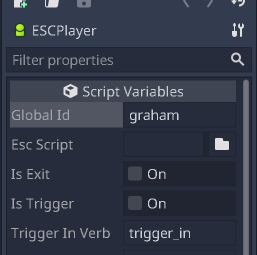
When we get to making our game more interactive later using the built-in ASHES scripting language, we need a way of identifying the character and the various items. ASHES uses global ids for this. Set the global id for the character using the parameter Global Id in the inspector panel:
Note
ASHES is the replacement for ESCscript. Not all mention of ESCscript has yet been swapped, so any fields mentioning ESCscript can be considered as meaning ASHES.
Adding a walkcycle
When a character moves across the screen, usually an animation is played to mimic the character walking. This is called a “walkcycle”.
Escoria can play different animations based on where the character is moving to. For example, Escoria will play an upward-facing walkcycle if the character moves from the bottom to the top of the screen, and a right-facing walkcycle if the character walks from to the left to the righthand side.
As Escoria can show mirrored animations: If your character looks the same on their left and right halves, you will not need animations showing them facing both left and right. Escoria can mirror any sideways-facing animations (e.g. walking right, walking up and right, walking down and right) to make the opposite side’s equivalent.
Start by copying the spritesheet image into the character folder.
Hint
Spritesheets combine multiple images of a sprite into one big image and are a very efficient way of using images in a game engine.
Then add a new AnimatedSprite2D node to the ESCPlayer node.
Next, add new animations with the appropriate animation frames using the images from the spritesheet:
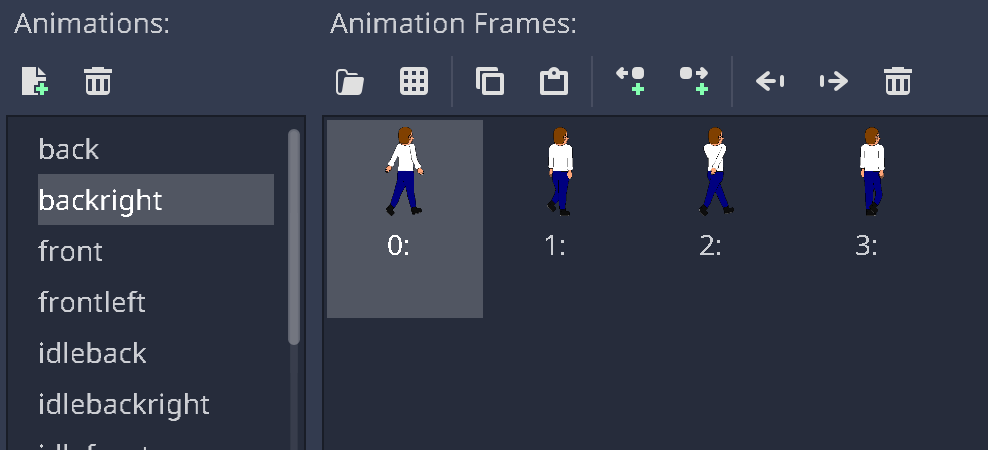
walkbackwalkbackrightwalkfrontwalkfrontleftwalkleftidlebackidlebackleftidlefrontidlefrontrightidleleft
Hint
These names can be anything that makes sense to you. If you want to use
“walk_down_right” or “moving_towards_and_right”, for example, instead of
“walkfrontright” then you can. The ESCAnimationResource
described below will link the direction the character is walking to the
animation you’ve created.
Hint
All the animations for the character (walk/idle/talk) live inside the
one AnimatedSprite2D node for the character.
Refer to the AnimatedSprite2D tutorial in the Godot docs to learn how to do this if you need some help.
Also, as discussed above, we’ll be using Escoria’s ability to mirror animations in order to create the missing directions.
Telling Escoria about the walkcycle
Now that the basic animations exist, we need to tell Escoria when to play which animation.
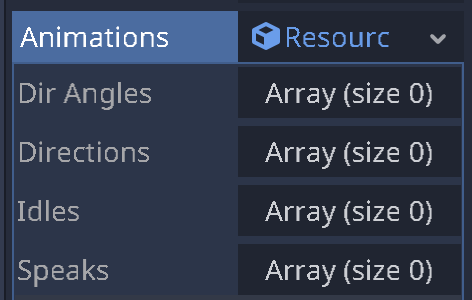
To achieve this, create a new ESCAnimationResource in the ESCPlayer
node’s animations property:

Click on the new resource to reveal the relevant settings:
Escoria does not limit the developer in how many walkcycle directions a character can have. It can be 4 (left, right, front, back), 8 (with diagonal directions) ,or even more!
To achieve this degree of freedom, Escoria needs to know which directions are available. It does that by defining angle ranges within a 360° circle.
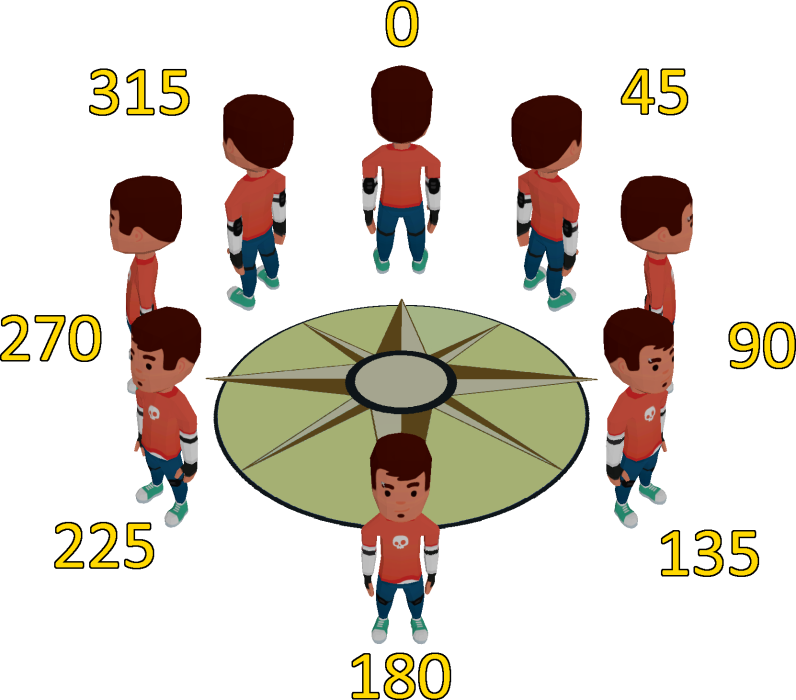
The angle 0° would show the character facing away from the camera, 90° facing to the right, and so forth.
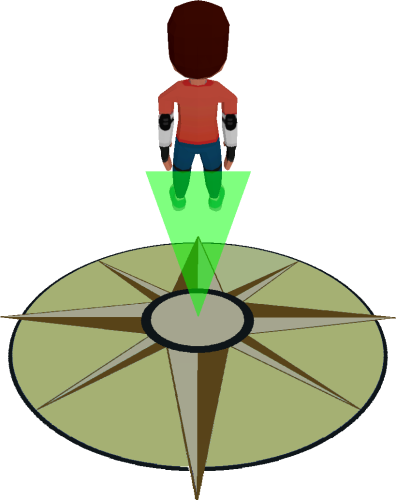
The walkcycles only show very specific angles for the character (e.g. for a 4 direction character, there are only animations for angles 0, 90, 180 and 270 degrees). When the player moves the character in a direction that isn’t one of these angles, however, Escoria needs to work out which animation the developer would like to use. To do this, when defining a character animation, the developer provides the angle range that will match that animation direction. In this diagram, the green area shows that the developer has chosen that movement in a 40° range starting from 340° (i.e. from 340° to 20°) will correspond to the “up” animation.
For this example, our character will support walking in 8 directions, so we set
up the Dir angles parameter like this:
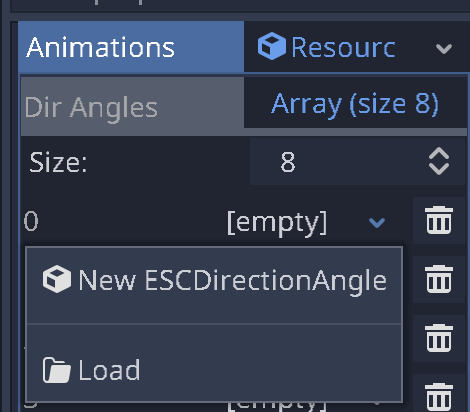
Click on Dir Angles and set the size to 8. For each slot, add an
ESCDirectionAngle resource.
Click on each resource and set its angle start and angle size settings based on the 8-direction character table below.
This will define 40° ranges for the upper, left, right, and back animations as well as 50° ranges for the diagonal directions. This setup will result in a very smooth animation.
Warning
Make sure that you always define the complete 360° circle when defining a character’s direction angles!
2-direction Character
Resource Table Entry |
Walk Direction |
Character Start Angle |
Character Angle Size |
|---|---|---|---|
Entry 1 |
Up |
0 |
180 |
Entry 2 |
Up Right |
180 |
180 |
4-direction Character
Resource Table Entry |
Walk Direction |
Character Start Angle |
Character Angle Size |
|---|---|---|---|
Entry 1 |
Up |
315 |
90 |
Entry 2 |
Right |
45 |
90 |
Entry 3 |
Down |
135 |
90 |
Entry 4 |
Left |
225 |
90 |
8-direction Character
Resource Table Entry |
Walk Direction |
Character Start Angle |
Character Angle Size |
|---|---|---|---|
Entry 1 |
Up |
340 |
40 |
Entry 2 |
Up Right |
20 |
50 |
Entry 3 |
Right |
70 |
40 |
Entry 4 |
Down Right |
110 |
50 |
Entry 5 |
Down |
160 |
40 |
Entry 6 |
Down Left |
200 |
50 |
Entry 7 |
Left |
250 |
40 |
Entry 8 |
Up Left |
290 |
50 |
Now that we have defined where we want Escoria to play character animations, we just need to connect the individual animations with the direction angles.
The additional properties of the ESCAnimationResource define the
specific animations for the character for each direction angle:
Directions: Walk animationIdles: Idle animationsSpeaks: Speaking animations
For each direction angle, add an ESCAnimationName. Then, click each
ESCAnimationName, put the name of the matching animation
(with the name specified in Adding a walkcycle above) in the “Animation”
field, and choose whether that animation should be played as mirrored by selecting
the “Mirrored” checkbox.
These are the first 3 settings for the Directions property:
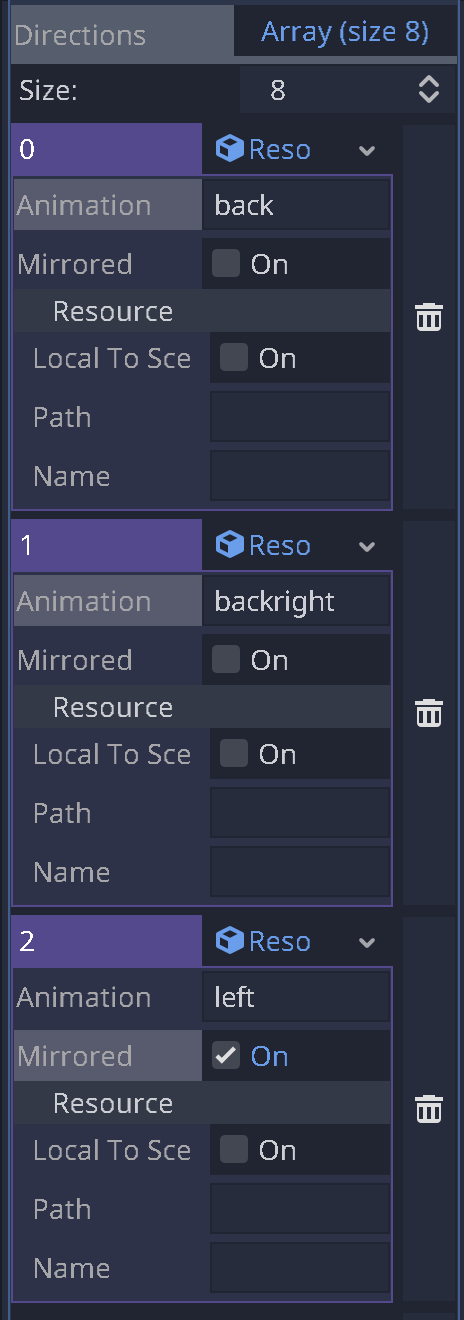
Each slot needs to contain a ESCAnimationName resource.
Try to set up the Directions, Idles, and Speaks animations by
yourself. Don’t forget to click Mirrored on when the image is facing the
opposite direction (for instance, we have a left animation and
item numbered 2 in our arrays corresponding to moving right, so, in the
above screenshot, item 2 uses a mirrored version of the left animation).
Hint
You can always use the idle animations for the speaking animations to get
you going. Tip: If you click the down arrow beside an ESCAnimationName
entry, you can select “copy”, and then use that to paste into a different
ESCAnimationName resource slot using its down arrow and selecting “paste”!
Hint
If you ever get stuck in designing your game, why not check out the community on our Discord server? We’re always happy to help.
Defining the character base position
Escoria will move the character sprite around based on a specific position in the character’s scene. This position tends to be located at the base of the character sprite.
We can define this position by moving the sprite up so its feet are located at the origin of its scene:

Hint
Be sure to ONLY move the animated sprite and collision shape nodes, and not the root node. Godot will show a warning in the scene tree panel if you move the root node’s origin, telling you that doing so is unlikely to be respected by Godot.
If you notice weird placement or rendering behaviour of the character in your game, double check to make sure the correct nodes we re-positioned, and not the root node of the character’s scene.
Preparing the character for interactions
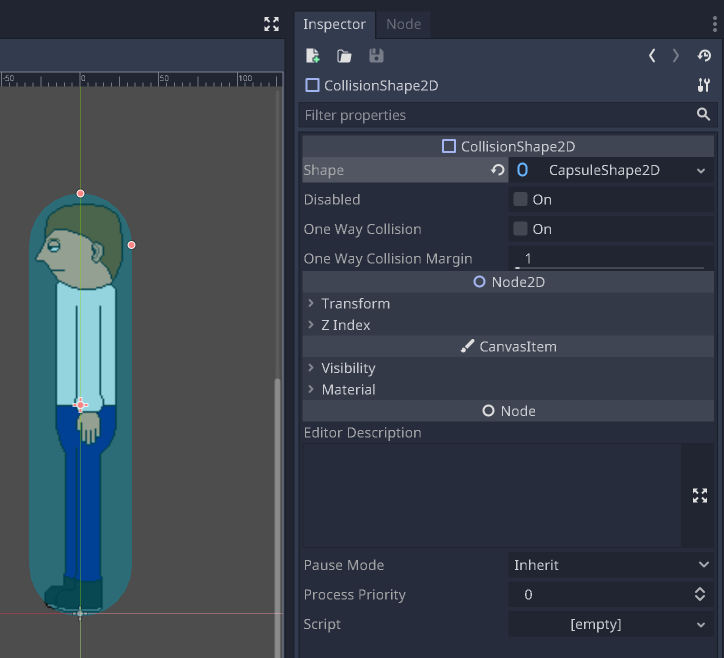
To detect interactions in the game such as when a character reaches an exit or moves onto a trigger, Escoria uses Godot’s built-in collision detection. For this to work, we need to add a collision shape to the character which roughly defines its outline.
Add a CollisionShape2D node to the ESCPlayer and use a
CapsuleShape2D shape to cover the sprite.
This concludes creating a player character. Let’s create a room.