Creating a custom UI
The game scene is the central scene of your game. It is important to have this
scene created in your game because it will be automatically called by Escoria
through an API defined by the class ESCGame. Your job is to override the
functions provided by this API if and where needed.
With respect to the visual parts of this scene, you may consider that the game scene gathers all the static visual parts of your game: a verbs interface (whatever you want it to be: buttons, mouse cursors, …), inventory (also whatever you want it to be), dialog choices, and the tooltip.
This scene is in charge of multiple things:
Displaying the static UI elements.
Managing the input actions from the player on inventory items, on the background, on items, etc.
Containing the dialog elements.
Containing the tooltip.
Containing the game camera.
Root node and script
Create a scene and add a Node2D as the scene’s root node. Then attach a new
script to the root node. This script must extend the ESCGame class.
extends ESCGame
When Escoria detects an input event from the player on a game element, it needs to transform the event into a game action. For example:
Left mouse-click on the background makes the main character move to the clicked position.
Right mouse-click on an item performs the “look” action on the item.
Left double-click on an item on the floor makes the character move more quickly towards the item.
Hovering over an item with the mouse shows the label of the item and outlines it.
These are just some proposals. As the actual “game” reaction to player inputs is the choice of the game developer (you!), it is necessary to override some functions to tell Escoria what to do in each case.
To do so, ESCGame provides an API for you to override. Note that you don’t
have to override each one of the methods it provides as most already perform a
default action; you reimplement only the ones you need. To get the list of
available methods, please refer to ESCGame.
For now we’ll keep it simple and leave the script empty: Escoria will use the default implementation of the API for each method.
ESCCamera node
The ESCCamera is a simple Godot Camera2D that you can control from an
ESC script. To simplify this control, it also requires a modified Tween node
as a child (don’t worry: this is automatically created when the camera is added
to the scene tree).
Create a new scene. Add an ESCCamera node as the root node of the scene. In
the Inspector, tick the “Current” parameter and leave the other parameters
unchanged from their respective defaults.
Save the scene: You’re done. Now, instance this scene into the game scene.
TODO: Why create a scene an instance it? Why not just create a single ESCCamera node? Also, check out escoria-demo-game#413.
User interface
The user interface features multiple elements which are used in your game. Most of them are visual and can be hidden by default:
Verbs
Inventory
Tooltip
Pause menu
Dialog player (not directly visual, but loads and displays visual scenes)
There is no mandatory way to build the visual aspect of your UI, although we
advise you to create some CanvasLayers to better separate these elements.
Add a new CanvasLayer node to the game scene and name it ui.
Tooltip
The tooltip is a scene that can display text labels for focused elements as
well as some named actions if a verb is selected. Escoria provides the
ESCTooltip node for this purpose: It can contain the currently selected
verb name, up to 2 targets, and 1 preposition. This allows you to construct
this kind of phrasing:
<current verb> <current target> <preposition> <current target 2>
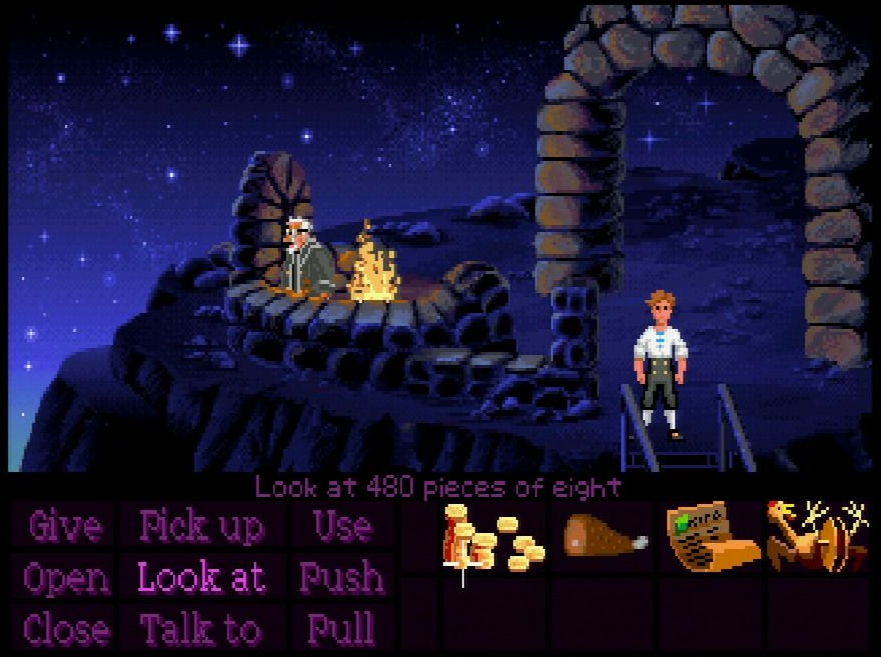
This example would give sentences similar to old LucasArts games:
<use> <rubber chicken> <on> <cable>
The way the actual text is constructed is up to you, so you don’t have to use all these elements. For our example, we will show only the first target like so:
<current target>
Create a new scene. Add an ESCTooltip as its root node. Detach the default
script attached of this node and create and attach a new one extending
ESCTooltip with this script:
extends ESCTooltip

func update_tooltip_text():
    bbcode_text = "[center]" bbcode_text += "[color=#" +
    color.to_html(false) + "]" bbcode_text += current_target bbcode_text +=
    "[/color]" bbcode_text += "[/center]" update_size()
This update_tooltip_text() function creates a centered, colored (with the
ESCTooltip.color value) text containing only the value of
ESCTooltip.current_target.
Save the scene and instance it in the game scene.
Verbs
Depending on your game, you’ll have to define some actions in order to allow the player to interact with the environment and the items within it. We define these actions by using verbs. Among the most classic verbs: look, use, talk, give, etc.
These actions will need to be selected by the player to perform the action desired. The way a verb can be selected has to be defined by you, the game developer. Every graphical adventure game proposes a different way for the player to select the action. Here are some examples:
Escoria does not require you to define a specific scene to allow the player to select the verb to be used, but you can do so.
Whatever you choose, remember that the way you design the UI for your verbs is not related to Escoria–all Escoria needs you to do is to inform its component Action Manager to set the current action.
Escoria’s Action Manager can be accessed using escoria.action_manager
which provides 2 methods:
escoria.action_manager.set_current_action(action: String): Use this method to set the current action to be used.escoria.action_manager.clear_current_action(): Use this method to clear the current action so that no action happens on click.
For our example, we decide that our game will only provide 2 actions: “use” and “talk”. The player will have to click the button associated with each action to select it.


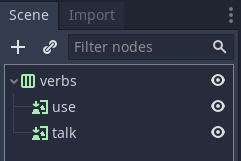
Create a new scene that will hold the UI of the verb selection. Make the root
node of the scene an HBoxContainer. Then, add 2 child nodes of type
TextureButton. You can rename these 2 nodes with each action’s name for
clarity.
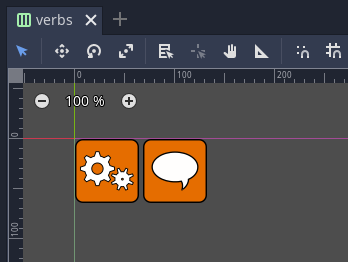
Set each of these buttons’ texture_normal setting to use the appropriate texture.
Now, we need to script this scene so that Escoria’s Action Manager is informed that an action button was clicked and therefore needs to change the current action verb.
Create and attach a new script for the root node that uses the following:
extends HBoxContainer

func _ready():
    $use.connect("pressed", self, "_on_action_button_pressed", ["use"])
    $talk.connect("pressed", self, "_on_action_button_pressed", ["talk"])


func _on_action_button_pressed(action: String):
    escoria.action_manager.set_current_action(action)
In this example, we connect each button’s pressed event to the
_on_action_button_pressed method, which we provide with the actual verb
name as a String parameter.
Save the scene and instance it in the game scene.
Dialog player
The dialog player is an Escoria node (ESCDialogPlayer) that needs to be
added to the game scene. It is automatically called by Escoria when
a dialog line has to be displayed on the screen, and when the player needs
to choose a dialog option during gameplay.
When this happens, the ESCDialogPlayer node will first instance the
defined dialog manager node (which can be setup in a plugin; see the
Create dialog manager page for more details) as
a child of the dialog player node, if it hasn’t been already.
Then, the dialog player calls the appropriate methods of the Dialog Manager,
either displaying dialog lines or a dialog chooser. Both modes are scenes
defined in the dialog manager plugin. When required, they are instanced as
children of the Dialog Player and are subsequently destroyed when they’ve
fulfilled their purpose.
The ESCDialogPlayer node requires almost no customization: It
may only require a Godot theme resource to be assigned to its theme
property to override the eventual theme defined for the dialog line and
dialog chooser scenes.
Inventory
Coming soon: Head to the Create inventory page to create this scene. When it’s created, instance it in the game scene.